How to Set Up a Home Theater: A Step-by-Step Guide
Each product is chosen independently by our editors. Purchases made through our links might earn us a commission at no extra cost to you!
Introduction
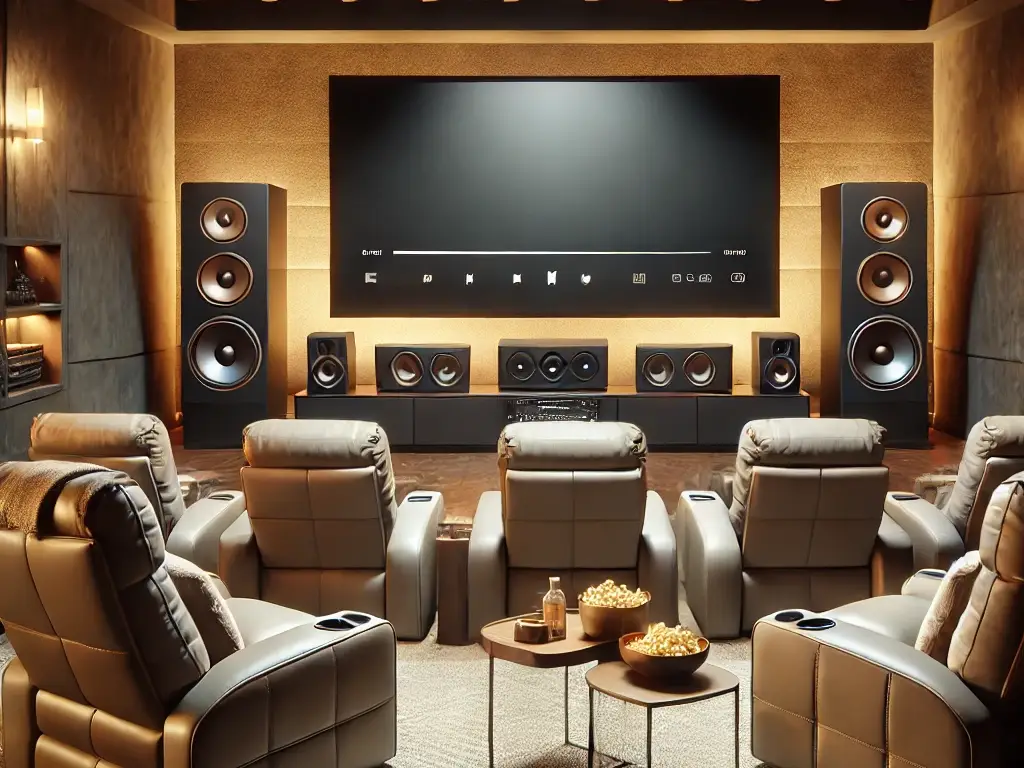
Imagine transforming your living room into a private cinema where you can enjoy blockbuster movies, binge-watch your favorite shows, or immerse yourself in a thrilling gaming session. With a home theater setup, you can bring the magic of the big screen into the comfort of your home. No more expensive movie tickets or long queues—just you, your family, and an incredible viewing experience tailored to your preferences.
Setting up a DIY home theater may sound overwhelming, but it’s easier than you think. Whether you’re a casual movie lover or a tech enthusiast aiming for a best home theater projectors and premium home theater audio system, this step-by-step guide will walk you through everything you need to know.
What You Will Learn
In this guide, we’ll cover:
- Planning Your Space: Choosing the ideal room and understanding the budget.
- Essential Equipment: From home theater projectors to seating ideas for comfort.
- Step-by-Step Installation: Clear instructions for setting up the screen, projector, audio, and more.
- Advanced Tips: Enhancing your DIY home theater setup with smart features and surround sound.
- Troubleshooting Issues: Solutions for common problems like blurry visuals or poor audio.
By the end of this guide, you’ll have a fully functional home cinema setup ready to provide you with endless entertainment. Whether you prefer movies, sports, or gaming, your personalized home theater will become the ultimate relaxation spot.
Want to know more about the top projector options? Explore our Best Home Theater Projectors to find the perfect match for your setup.
Table of Contents
Planning Your Home Theater
Before diving into the technical setup, careful planning is essential to ensure your home theater setup meets your expectations. From choosing the right space to understanding your budget and layout, this step will help you lay a solid foundation for an unforgettable cinematic experience.
1. Choose the Ideal Room
The first step is identifying the perfect space for your DIY home theater setup. Consider the following factors when selecting a room:
Room Size:
- Small to medium rooms are ideal for best home theater projectors and surround sound systems.
- Larger rooms may require additional audio equipment and a larger screen.
Lighting:
- A room with minimal natural light (e.g., basement or windowless room) is ideal for better screen visibility.
- If the room has windows, use blackout curtains to eliminate glare.
Acoustics:
- Opt for carpeted floors, soft furnishings, and acoustic panels to reduce echoes and enhance sound quality.
Tip: If possible, dedicate a specific room to your home cinema setup for the ultimate experience.
2. Decide on Your Budget
Setting a clear budget will help you choose the right equipment and accessories without overspending. Here’s a breakdown of the three main budget levels:
Budget-Friendly Setup ($500–$1,000):
- A basic home theater projector (720p–1080p).
- Soundbar or compact Bluetooth speakers.
- DIY projection screen using a white wall or sheet.
Mid-Range Setup ($1,000–$3,000):
- High-quality 1080p or 4K projector.
- 5.1 or 7.1 home theater audio system.
- Fixed or portable projection screen.
Premium Setup ($3,000+):
- 4K HDR projector or OLED TV.
- Dolby Atmos surround sound system.
- Recliner seating, smart lighting, and advanced acoustic treatment.
Tip: Start with essential components and upgrade gradually as your budget allows.
3. Plan the Layout of Your Room
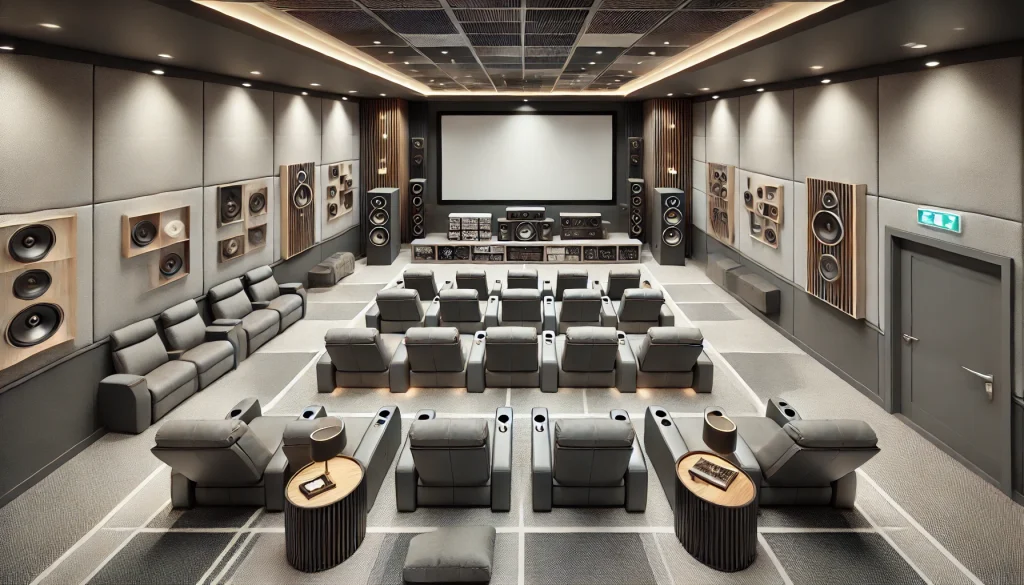
A well-thought-out layout ensures every guest has an optimal viewing and listening experience.
Steps to Plan Your Layout:
Screen Placement:
- Position the projector screen or TV on the largest wall.
- Ensure the screen is at eye level when seated.
Seating Arrangement:
- For smaller rooms: Use sofas, bean bags, or cushioned chairs.
- For larger spaces: Add home theater seating ideas like recliners arranged in rows.
Speaker Placement:
- For a 5.1 audio system:
- Center speaker: Below the screen.
- Front speakers: To the left and right of the screen.
- Rear speakers: Behind the seating area.
- Subwoofer: Near the front for deep bass.
- For a 5.1 audio system:
Cabling:
- Use cable organizers to keep wires tidy.
- Consider wall mounts or floor channels to hide cables for a clean look.
Get more ideas on arranging seating in our Home Theater Seating Ideas Guide.
4. Consider Future Upgrades
While planning, think about the possibility of future upgrades to your home theater setup:
- 4K HDR Projectors: Future-proof your setup with a projector that supports 4K resolution.
- Smart Features: Integrate smart lighting and voice control for convenience.
- Acoustic Panels: Improve sound quality as your system grows more advanced.
Tip: Always leave space for additional speakers, screens, or accessories in your layout.
Summary: Key Planning Steps
| Step | Details |
|---|---|
| Choose the Room | Minimal light, good acoustics. |
| Set Your Budget | Budget, mid-range, or premium setup. |
| Plan the Layout | Screen, seating, and speaker setup. |
| Consider Upgrades | Future-proof with 4K and smart tech. |
Essential Equipment Checklist
Setting up the perfect home theater setup starts with choosing the right equipment. From projectors to audio systems and seating, this checklist covers all the must-have components to create an immersive home cinema experience.
1. Projector or TV: The Heart of Your Setup
The first decision is choosing between a home theater projector and a large-screen TV.
Home Theater Projector:
- Ideal for a cinematic experience with screen sizes up to 150 inches or more.
- Compact and versatile, perfect for dedicated home theaters.
- Recommended Models:
- 4K Home Theater Projector X1000 – Crystal-clear visuals and HDR support.
- Budget-Friendly HD Projector P500 – Perfect for smaller spaces.
Large-Screen TV:
- Provides ultra-high-definition (UHD) clarity with HDR and smart features.
- Recommended Models:
- 120-inch 4K OLED Smart TV – Stunning visuals with vibrant colors.
Discover more options in our Best Home Theater Projectors Guide.
2. Projection Screen
A high-quality projection screen enhances the clarity and brightness of your projector.
- Fixed Frame Screen: Perfect for dedicated spaces with permanent installations.
- Motorized or Pull-Down Screen: Great for multi-purpose rooms.
- DIY Option: Use a white wall or screen paint for a budget-friendly solution.
Recommended Products:
- 120-inch Motorized Projection Screen – Easy to use and retractable.
- Fixed Frame 4K Screen 100-inch – Ideal for permanent setups.
Tip: For 4K projectors, choose a screen with high reflectivity to maximize image quality.
3. Home Theater Audio System
Audio is just as important as visuals in creating an immersive experience.
- Soundbars: Compact and perfect for small to medium rooms.
- Recommended Product: Dolby Atmos Soundbar S500 – Exceptional surround sound in a sleek design.
- 7.1 Surround Sound System: Perfect for larger rooms and advanced audio enthusiasts.
- Recommended Product: 7.1 Surround Sound Elite System Z900.
Tip: Place the subwoofer near the front of the room for deep, powerful bass.
4. Media Players and Streaming Devices
To access your favorite movies, shows, and games, a reliable media player is essential:
- Streaming Devices:
- Apple TV 4K – Stream in 4K HDR with Dolby Vision.
- Amazon Fire TV Stick 4K – Affordable and feature-packed for streaming.
- Blu-ray Players: For physical media and 4K HDR playback.
- Panasonic 4K Blu Ray Player – Perfect for cinephiles who prefer discs.
Tip: Choose devices that support 4K HDR for the best visual quality.
5. Home Theater Seating
Comfortable seating makes all the difference in your home cinema setup.
- Recliner Chairs: Plush and adjustable for ultimate comfort.
- LeatherSoft Recliner Chair with Ottoman – Premium seating with cup holders and USB ports.
- Sofas and Sectionals: Perfect for families or larger groups.
- Modular Home Theater Sofa – Stylish, spacious, and cozy.
Tip: Arrange seats to provide a clear view of the screen for everyone.
6. Lighting and Accessories
The final touches add ambiance and convenience to your DIY home theater setup.
- Smart LED Lights: Install dimmable lights that can be controlled via apps.
- Govee Smart Ceiling Light, RGBIC LED Ceiling Light Fixture – Perfect for creating a cinematic mood.
- Acoustic Panels: Reduce echoes and improve sound quality.
- Cable Organizers: Keep wires tidy and prevent clutter.
Tip: Add small side tables for snacks, drinks, and remotes.
Checklist Summary
| Category | Recommended Products |
|---|---|
| Projector or TV | 4K HDR Projector, 65-inch OLED TV |
| Projection Screen | Motorized Screen, Fixed Frame Screen |
| Audio System | Dolby Atmos Soundbar, 5.1/7.1 Systems |
| Media Players | Apple TV 4K, Ultra HD Blu-ray Player |
| Seating | Recliner Chairs, Sectional Sofas |
| Lighting & Accessories | Smart LED Lights, Acoustic Panels |
Step-by-Step Home Theater Setup
Step 1: Set Up the Screen or TV
The first step in building your home theater setup is setting up the screen or TV. Choosing the right placement and angle ensures an optimal viewing experience and sets the foundation for a cinematic atmosphere.
1. Decide Between a Projector and a TV
Both home theater projectors and large-screen TVs have their pros and cons. The choice depends on your room size, budget, and viewing preferences:
Home Theater Projectors:
- Ideal for large screens up to 120–150 inches.
- Compact and easy to set up for dedicated home theaters.
- Recommended Product:
- 4K HDR Projector X1000 – Stunning 4K visuals with sharp detail and color accuracy.
Large-Screen TVs:
- Perfect for bright rooms or spaces where wall mounting is preferred.
- Ultra-HD TVs deliver 4K HDR clarity without needing a dark room.
- Recommended Product:
- 75-inch OLED Smart TV – Vibrant display with deep contrast and smart features.
Tip: For a true cinematic feel, projectors paired with a high-quality screen are ideal for dedicated home cinema setups.
2. Position the Screen or TV at Eye Level
Proper placement of your screen or TV ensures comfort and an optimal viewing angle:
For a Projector Screen:
- Mount the screen on the largest wall or use a tripod stand for portable options.
- Ensure the bottom of the screen is 2–3 feet above the ground for comfortable viewing.
For a TV:
- Use a wall mount or TV stand to place the TV at eye level from the main seating position.
- The center of the TV should be around 42 inches from the ground for most viewers.
Tip: Use a laser level to ensure the screen or TV is perfectly aligned.
- Motorized Projection Screen 100-inch – Smooth setup for a clean, modern look.
- Universal TV Wall Mount – Adjustable mount for TVs up to 75 inches.
3. Optimize the Viewing Distance
The distance between your screen or TV and seating plays a critical role in image clarity and comfort:
For TVs:
- Multiply the TV size by 1.5–2.5 for the ideal distance.
- Example: For a 75-inch TV, the seating should be 9–12 feet away.
For Projectors:
- Follow the projector’s throw ratio to determine the correct placement.
- Example: A projector with a throw ratio of 1.5:1 will need to be 12 feet away for an 8-foot wide screen.
4. Ensure the Room Has Minimal Glare
Ambient light and reflections can impact your viewing experience, especially for projectors.
For Projectors:
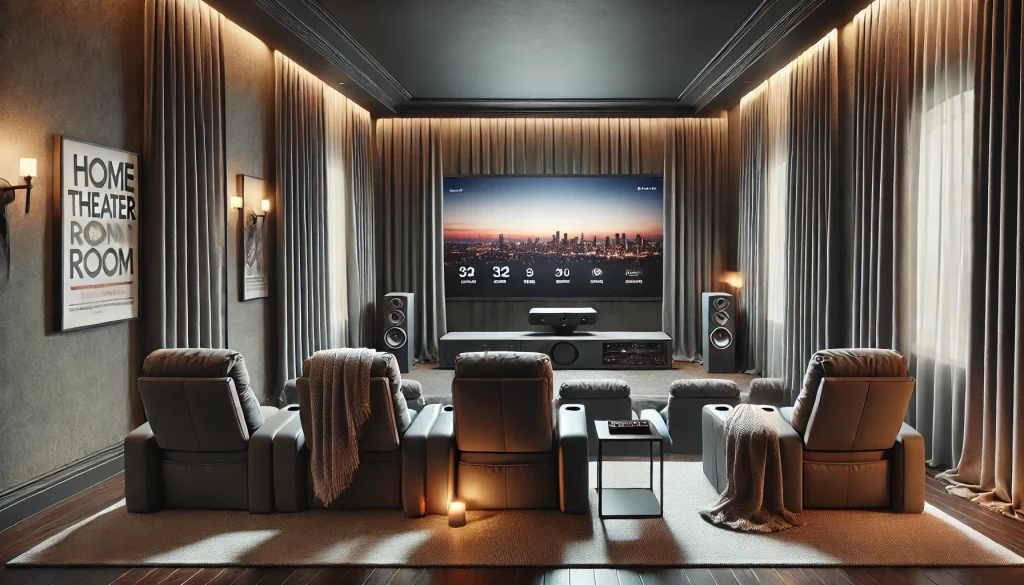
- Use blackout curtains or shades to block sunlight.
- Position the screen away from windows or light sources.
For TVs:
- Choose an anti-glare screen if your room has significant light.
- Avoid placing the TV opposite windows or bright lamps.
- Blackout Curtains for Home Theater – Eliminate glare and create a dark, immersive space.
Tip: Add soft ambient lighting with smart LED strips behind the screen to reduce eye strain.
5. Test and Adjust
Once the screen or TV is in place, make a few adjustments to ensure everything looks perfect:
Adjust Picture Settings:
- For TVs: Enable Cinema Mode or Movie Mode for natural colors.
- For Projectors: Use the focus ring to sharpen the image and adjust keystone correction if needed.
Test Different Angles:
- Sit in multiple seating positions to confirm the screen is visible and centered.
Calibrate the Picture:
- Fine-tune brightness, contrast, and color settings to match your room’s lighting conditions.
Checklist for Step 1
- Choose between a projector or a large-screen TV.
- Mount the screen or TV at eye level.
- Optimize the viewing distance for comfort.
- Eliminate glare using blackout curtains or anti-glare screens.
- Adjust picture settings for optimal image quality.
Step 2: Position the Projector or TV
Once you’ve set up the screen or TV, the next crucial step in your home theater setup is positioning the projector or TV correctly. Proper placement ensures optimal image quality, viewing comfort, and a truly immersive experience.
1. Positioning the Projector
To achieve the best image quality with a home theater projector, follow these steps:
Calculate the Throw Distance:
- Refer to your projector’s throw ratio (e.g., 1.5:1).
- Formula: Multiply the screen width by the throw ratio to find the ideal distance.
- Example: For a 100-inch screen (width ~8.5 feet) and a throw ratio of 1.5:1, the projector should be placed 12.75 feet away.
Choose the Right Placement:
- Ceiling Mount: Provides a clean, professional look and saves space.
- Recommended Product: Universal Projector Ceiling Mount P300.
- Table Placement: Ideal for portable or temporary setups. Place the projector on a sturdy table at the correct height.
- Recommended Product: Adjustable Projector Stand S200.
- Ceiling Mount: Provides a clean, professional look and saves space.
Adjust Keystone and Focus:
- Use the projector’s keystone correction feature to fix image distortion.
- Turn the focus ring until the image appears sharp and clear.
Tip: Use a laser level to ensure the projector is perfectly aligned with the screen.
2. Positioning the TV
If you’ve chosen a large-screen TV for your DIY home theater setup, follow these steps to position it correctly:
Optimal Height:
- Mount or place the TV so that the center of the screen is at eye level when seated (~42 inches from the ground).
Distance from Seating:
- Multiply the TV size by 1.5–2.5 for the ideal viewing distance:
- 65-inch TV: Sit 8–12 feet away.
- 75-inch TV: Sit 9–14 feet away.
- Multiply the TV size by 1.5–2.5 for the ideal viewing distance:
Avoid Reflections:
- Position the TV away from windows and bright light sources to minimize glare.
- Use anti-glare screens if needed.
- Full-Motion TV Wall Mount M500 – Adjustable for the perfect angle.
Tip: For larger TVs, use a wall mount to save floor space and create a cleaner setup.
3. Test the Alignment and Image Quality
After positioning your projector or TV, fine-tune the placement for the best visual results:
For Projectors:
- Use the test grid or a paused video to adjust focus and keystone.
- Ensure the projector is centered with the screen to prevent uneven edges.
For TVs:
- Adjust the TV angle using the wall mount or stand.
- Enable settings like Cinema Mode or Movie Mode for optimal brightness and contrast.
Tip: Play a short HD or 4K video to test clarity, sharpness, and alignment.
4. Consider Cable Management
Organize cables to maintain a clean and clutter-free look:
- Use cable organizers or clips to bundle wires.
- For ceiling-mounted projectors, run cables along the ceiling or inside cable channels.
- For TVs, hide cables behind the wall using in-wall kits or conduits.
- Cable Management Kit C100 – Keeps wires tidy and out of sight.
Tip: Label cables for easier troubleshooting and future upgrades.
Checklist for Step 2
- Calculate the throw distance for your projector.
- Position the projector or TV at the correct height and distance.
- Adjust keystone, focus, and picture settings for clarity.
- Test alignment using a test grid or paused video.
- Organize cables to keep the setup clean and professional.
Step 3: Arrange and Connect the Audio System
A high-quality home theater audio system is essential to create the immersive sound experience you expect from a professional cinema. Whether you’re using a soundbar, a 5.1 surround sound system, or a premium 7.1 surround sound setup, proper speaker arrangement and connections are key to achieving optimal audio performance.
1. Choose Your Audio Setup
Before arranging and connecting your system, decide which type of audio setup suits your space and budget:
Soundbars:
- Simple, compact, and easy to install.
- Ideal for small to medium rooms.
- Recommended Product:
- Dolby Atmos Soundbar X500 – Delivers rich, clear audio with virtual surround sound.
5.1 Surround Sound Systems:
- Includes 5 speakers (front left, center, front right, rear left, rear right) and 1 subwoofer.
- Perfect for small to mid-sized DIY home theater setups.
- Recommended Product:
- 5.1 Surround Sound System A700 – Crystal-clear dialogue and deep bass.
7.1 Surround Sound Systems:
- Adds 2 additional rear speakers for a more immersive soundstage.
- Best suited for larger rooms.
- Recommended Product:
- 7.1 Dolby Atmos Audio System Z900 – A premium option for advanced home theaters.
Tip: Start with a 5.1 system and upgrade to a 7.1 system later if needed.
2. Arrange the Speakers for Optimal Sound
Proper placement of your speakers ensures the best sound quality for your home cinema setup:
Center Speaker:
- Place directly below or above the screen, facing the audience.
- This speaker delivers clear dialogue.
Front Left and Right Speakers:
- Position at ear level on either side of the screen, angled slightly toward the center.
Rear Left and Right Speakers:
- Place behind the seating area, angled toward the viewers.
- For wall-mounted setups, keep them 2–3 feet above ear level.
Subwoofer:
- Place near the front wall, ideally in a corner for enhanced bass response.
Tip: For a 7.1 system, add two rear speakers behind the seating for a 360-degree sound experience.
- Speaker Wall Mount Kit W300 – Easily mount speakers for optimal positioning.
- Wireless Subwoofer S100 – Eliminate cable clutter with a wireless option.
3. Connect Your Audio System
Follow these steps to connect your speakers to your home theater setup:
Identify the Receiver or Soundbar:
- Connect your TV or projector to an AV receiver using an HDMI ARC cable.
- For soundbars, connect via HDMI or an optical audio cable.
Wiring the Speakers:
- Use high-quality speaker cables for wired systems.
- Connect each speaker to its designated port on the AV receiver:
- Center, Front Left, Front Right, Rear Left, Rear Right, and Subwoofer.
Calibrate Audio Levels:
- Use the receiver’s built-in auto-calibration tool to balance sound levels for each speaker.
- Alternatively, adjust manually using the AV receiver’s settings menu.
Test the Audio:
- Play a surround sound test video to confirm that all speakers are working properly.
Tip: Label each speaker wire to make future adjustments easier.
- HDMI ARC Cable Pro C200 – Ensures high-quality audio transfer.
- Speaker Cable Kit S500 – Premium cables for a clean and reliable connection.
4. Eliminate Cable Clutter
A clean setup not only looks great but also prevents accidents and improves accessibility:
- Use cable organizers or clips to bundle wires.
- Hide cables under carpets, inside wall conduits, or behind furniture.
- Opt for wireless speakers for a minimalist look.
- Cable Management Kit C100 – Keeps speaker cables neat and hidden.
Checklist for Step 3
- Choose between soundbars, 5.1, or 7.1 surround sound systems.
- Arrange the speakers for optimal positioning.
- Connect all speakers to the receiver or soundbar.
- Calibrate the audio levels for balanced sound.
- Organize and hide all speaker cables.
Step 4: Optimize Video and Audio Settings
Once your screen, projector, and audio system are in place, it’s time to fine-tune the video and audio settings to achieve a professional cinema-quality experience. Proper calibration will ensure crisp visuals and immersive sound in your home theater setup.
1. Calibrate Video Settings
Optimizing your video settings is crucial for getting the best picture quality.
For Projectors:
- Set the projector to Cinema Mode or Movie Mode for natural colors.
- Adjust the brightness and contrast based on your room lighting.
- Tip: Use a 50% brightness setting for dark rooms.
- Fine-tune the sharpness to avoid overly harsh edges.
- Enable HDR (High Dynamic Range) if supported for better contrast and vibrant visuals.
For TVs:
- Use the TV’s Movie Mode or Expert Settings for color accuracy.
- Turn off unnecessary enhancements like Motion Smoothing and Dynamic Contrast.
- Enable HDR10 or Dolby Vision for compatible content.
- 4K Calibration Tool Kit T400 – A must-have for precise video optimization.
2. Fine-Tune Audio Settings
Now let’s ensure your home theater audio system delivers balanced, powerful sound:
Run Auto-Calibration:
- Most AV receivers have a built-in auto-calibration feature. Place the included microphone at the main seating position and let the system adjust each speaker’s volume and delay.
Manually Adjust Speaker Levels:
- Use a test tone to set the speaker levels:
- Ensure all speakers are balanced at the same volume.
- Adjust the subwoofer volume to achieve deep but not overwhelming bass.
- Use a test tone to set the speaker levels:
Set Up Surround Sound Modes:
- Choose Dolby Atmos or DTS:X mode (if available) for the most immersive experience.
Tip: For dialogue clarity, slightly increase the volume of the center speaker.
- Digital Sound Calibration Tool A500 – Helps adjust speaker levels for optimal audio quality.
3. Adjust Screen Size and Alignment
For projector users, optimizing screen size and alignment ensures the image fits perfectly on the screen:
- Use the zoom and lens shift features on your projector to fine-tune the image.
- Adjust the projector’s keystone correction to fix any image distortion.
- Test alignment using a grid test pattern.
Tip: Always aim for a perfectly rectangular image with no overlaps on the screen’s edges.
- Adjustable Projector Mount P700 – Helps align the projector at the perfect angle.
4. Test the Settings with High-Quality Content
The final step is to test your settings with 4K HDR content and surround sound:
Video Test:
- Stream or play a movie with HDR10 or Dolby Vision to confirm sharpness, color depth, and contrast.
- Recommended Content: Movies like Avengers: Endgame or Planet Earth II.
Audio Test:
- Use a surround sound test video or a movie scene with Dolby Atmos audio.
- Sit in different seats to ensure consistent sound coverage.
Tip: Adjust settings based on the content type (e.g., Movies, Gaming, Sports) for the best experience.
Checklist for Step 4
- Set Cinema Mode or HDR for video calibration.
- Run auto-calibration or manually balance speaker levels.
- Adjust screen alignment for a perfectly rectangular image.
- Test video and audio settings with 4K HDR content.
Step 5: Add Comfort and Ambiance
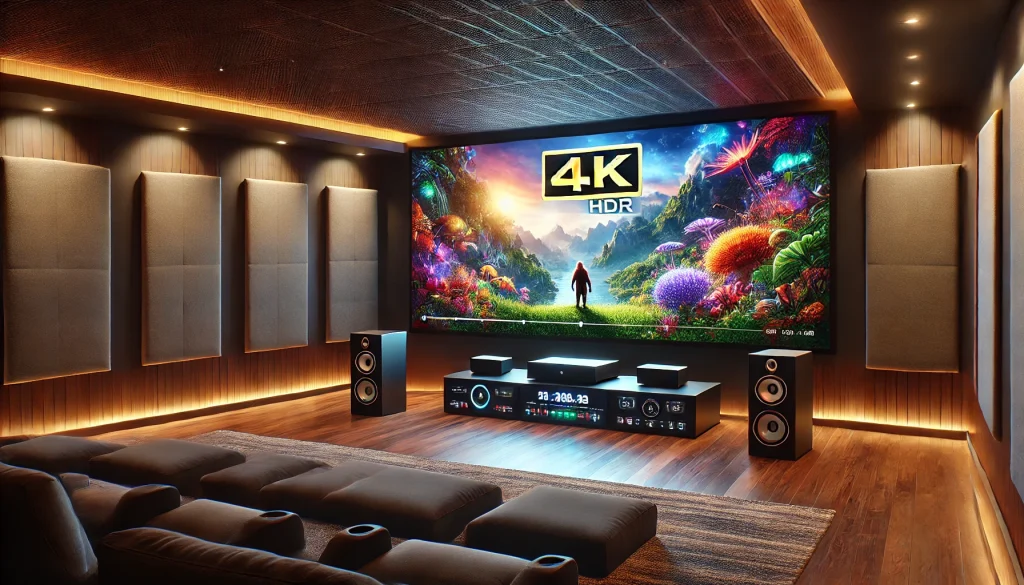
The final step in your home theater setup is creating an inviting and comfortable space with the perfect ambiance. The right seating, lighting, and decorations will elevate your experience, transforming your room into a cozy cinema where you can relax and fully enjoy your favorite movies.
1. Choose Comfortable Seating
Comfort is key to enjoying long movie marathons. Choose seating that fits your space and enhances the overall look of your DIY home theater setup:
Recliner Chairs: Adjustable, plush, and often equipped with cup holders and USB charging ports.
- Recommended Product: Luxury Home Theater Recliner R700 – Perfect for maximum comfort and convenience.
Home Theater Sofas: Ideal for families or larger groups, offering plenty of seating space.
- Recommended Product: Modular Home Theater Sofa S900 – Stylish, cozy, and customizable.
Bean Bags and Floor Cushions: Budget-friendly options that work well in smaller spaces or casual setups.
- Recommended Product: Memory Foam Bean Bag XL – Affordable and incredibly comfortable.
Tip: Arrange your seating so that every viewer has a clear, unobstructed view of the screen.
2. Add Smart Lighting
The right lighting enhances the cinematic atmosphere while reducing eye strain:
LED Backlighting: Install smart LED strips behind the screen or TV to create a soft glow.
- Recommended Product: Smart RGB LED Backlight Kit L500 – Customizable colors and remote control for ambiance.
Dimmable Ceiling Lights: Use smart bulbs that allow you to control brightness and color with your smartphone or voice assistant.
- Recommended Product: Smart Dimmable Light Bulbs S300.
Wall Sconces or Floor Lamps: Add soft ambient lighting that won’t overpower the visuals.
Tip: Sync smart lights with your movie content for an immersive experience, especially during action scenes.
3. Enhance Sound with Acoustic Treatments
Acoustic panels and rugs help improve audio quality by reducing echoes and absorbing unwanted noise:
Acoustic Wall Panels: Place panels on the walls and ceiling to optimize sound.
- Recommended Product: Sound-Absorbing Acoustic Panels A400 – Stylish and effective for any room.
Thick Rugs or Carpets: Cover the floor to reduce sound reflections and add warmth.
Tip: Start with acoustic panels on the front and back walls for the biggest impact.
4. Add Final Touches for a Cinematic Feel
Personalize your space with themed decorations and accessories:
- Movie Posters or Art: Frame posters of your favorite films to create a cinema vibe.
- Snack Station: Set up a small table with popcorn, snacks, and drinks for convenience.
- Recommended Product: Mini Popcorn Machine P600 – A fun addition to any home theater.
- Themed Décor: Use movie-themed blankets, cushions, or vintage film reels for a unique touch.
Tip: Keep a small storage area for remotes, chargers, and other accessories to keep the space tidy.
Checklist for Step 5
- Choose comfortable seating (recliners, sofas, or bean bags).
- Add smart lighting to enhance ambiance.
- Install acoustic panels to improve sound quality.
- Personalize the space with movie-themed decorations.
- Set up a snack station for convenience.
Troubleshooting Common Issues
Setting up a home theater setup can sometimes come with minor challenges. Here are solutions to the most common issues you might encounter, ensuring your system runs smoothly and delivers the ultimate cinematic experience.
1. Blurry or Distorted Image
Cause: The projector is not properly focused, or the alignment is off.
Solutions:
- Adjust the focus ring on the projector until the image appears sharp.
- Recheck the throw distance and ensure the projector is within the recommended range for your screen size.
- Use the keystone correction feature to fix any tilts or distortions.
- For TVs, enable auto-calibration or adjust sharpness settings.
- Digital Focus Calibration Tool T500 – Perfect for fine-tuning projector focus and clarity.
2. Audio Is Out of Sync
Cause: Delayed audio can occur when using wireless speakers or mismatched settings.
Solutions:
- If using a soundbar or AV receiver, enable Lip Sync Adjustment or Audio Delay in the settings menu.
- For Bluetooth speakers, switch to a wired connection (HDMI ARC or optical cable) for better synchronization.
- Check that the content source (media player or streaming device) is not experiencing lag.
- HDMI ARC Cable Pro C200 – Ensures seamless audio-video synchronization.
Tip: Always test audio and video with a short clip to verify synchronization before starting a movie.
3. Poor Sound Quality or Weak Bass
Cause: Incorrect speaker placement or subwoofer settings.
Solutions:
- Verify that the front, rear, and center speakers are placed according to the recommended layout.
- Adjust the subwoofer volume and position it near a corner to amplify bass response.
- Run the auto-calibration tool on your AV receiver for balanced audio levels.
Tip: Use acoustic panels to reduce echoes and improve sound clarity.
- Wireless Subwoofer S100 – Perfect for enhanced bass without messy cables.
- Acoustic Panel Kit A400 – Reduces echoes and improves audio performance.
4. Projector Overheating
Cause: Blocked ventilation or prolonged usage.
Solutions:
- Place the projector in a well-ventilated area to ensure proper airflow.
- Clean the projector vents regularly to remove dust and debris.
- Avoid placing the projector near walls or other heat-generating equipment.
- Use a cooling fan or an external cooling pad for long movie sessions.
- Projector Cooling Fan System P700 – Keeps your projector cool and prevents overheating.
5. Connectivity Issues
Cause: Loose cables, outdated firmware, or interference with wireless devices.
Solutions:
- Double-check all HDMI, optical, or AUX cables to ensure they are securely connected.
- Update the firmware on your projector, TV, or streaming device.
- For wireless devices, ensure there is no interference and reset the Bluetooth connection if necessary.
- Replace damaged cables with high-quality alternatives for reliable performance.
- High-Speed HDMI Cable Pro C300 – Ensures stable and high-quality connections.
6. Screen Glare or Washed-Out Image
Cause: Excess ambient light or incorrect projector settings.
Solutions:
- Use blackout curtains or shades to block natural light in the room.
- Adjust the projector’s brightness and contrast settings to match your room’s lighting conditions.
- For TVs, enable the anti-glare mode or use screens with an anti-reflective coating.
- Blackout Curtains for Home Theater B200 – Eliminates ambient light for a darker, immersive setup.
Troubleshooting Checklist
| Issue | Solution |
|---|---|
| Blurry Image | Adjust focus, throw distance, and keystone. |
| Audio Delay | Enable Lip Sync Adjustment, use HDMI ARC. |
| Weak Sound or Bass | Adjust speaker placement and run calibration. |
| Projector Overheating | Ensure proper ventilation and clean vents. |
| Connectivity Problems | Secure cables, update firmware, and reset connections. |
| Screen Glare | Use blackout curtains and adjust settings. |
FAQs
1. What’s the difference between a projector and a TV for a home theater setup?
Both options have their advantages:
- Projectors: Ideal for larger screens (100–150 inches) and a cinematic experience. Best for dedicated home theater rooms.
- TVs: Provide brighter displays and better performance in well-lit rooms. Ideal for smaller spaces and casual use.
Tip: For large rooms, a 4K HDR projector is the best choice.
2. How much does it cost to set up a home theater?
The cost of a DIY home theater setup can vary:
- Budget-Friendly: $500–$1,000 for basic projectors and soundbars.
- Mid-Range: $1,000–$3,000 for 4K projectors and surround sound systems.
- Premium: $3,000+ for advanced projectors, Dolby Atmos systems, and luxury seating.
Tip: Start with essentials and upgrade gradually.
3. What is the ideal room size for a home theater setup?
A medium-sized room (12×15 feet) works best for most setups. For projectors, ensure there’s enough throw distance (10–15 feet) between the screen and projector.
Tip: Larger rooms may require additional speakers for balanced sound.
4. Where should I place my speakers for the best audio experience?
For a 5.1 surround sound setup:
- Center Speaker: Below or above the screen.
- Front Left/Right Speakers: Angled slightly toward the seating.
- Rear Speakers: Behind the seating, elevated 2–3 feet above ear level.
- Subwoofer: Near the front for deep bass.
5. Can I use a soundbar instead of a surround sound system?
Yes, soundbars are an excellent option for smaller rooms and budgets. Models with Dolby Atmos provide virtual surround sound that mimics a multi-speaker setup.
6. How do I reduce glare on my projector screen or TV?
To reduce glare:
- Use blackout curtains to block natural light.
- Position the screen away from windows and light sources.
- For TVs, choose anti-glare screens or enable anti-reflective settings.
7. How do I connect my streaming device to the projector?
Follow these steps:
- Use an HDMI cable to connect the streaming device (e.g., Amazon Fire Stick, Apple TV) to the projector.
- For sound, connect the projector to your sound system via HDMI ARC or optical cable.
- Select the correct input source on the projector.
8. Do I need acoustic panels for my home theater setup?
Acoustic panels improve audio by reducing echoes and unwanted noise. They are especially helpful in larger rooms with hard surfaces.
Tip: Place panels on the front and rear walls for the best results.
9. What type of screen should I use with a projector?
Choose a screen based on your needs:
- Fixed Frame Screen: Best for dedicated home theater rooms.
- Motorized Screen: Retractable and space-saving.
- DIY Option: Use a white wall or screen paint for budget setups.
10. How do I maintain my projector to keep it running smoothly?
- Clean the air vents and lens regularly to avoid dust buildup.
- Place the projector in a well-ventilated area to prevent overheating.
- Replace the projector lamp as recommended in the user manual.
Conclusion
Creating your own home theater setup is easier than you think. By following this step-by-step guide, you can transform any room into a fully immersive cinematic experience. From choosing the right projector or TV, arranging your audio system, to adding comfortable seating and ambiance, you now have all the tools to get started.
With careful planning, smart equipment choices, and a little creativity, your DIY home theater setup will soon become the ultimate space for movie nights, gaming marathons, and unforgettable family entertainment. Whether you’re working on a tight budget or aiming for a premium setup, the possibilities are endless.


